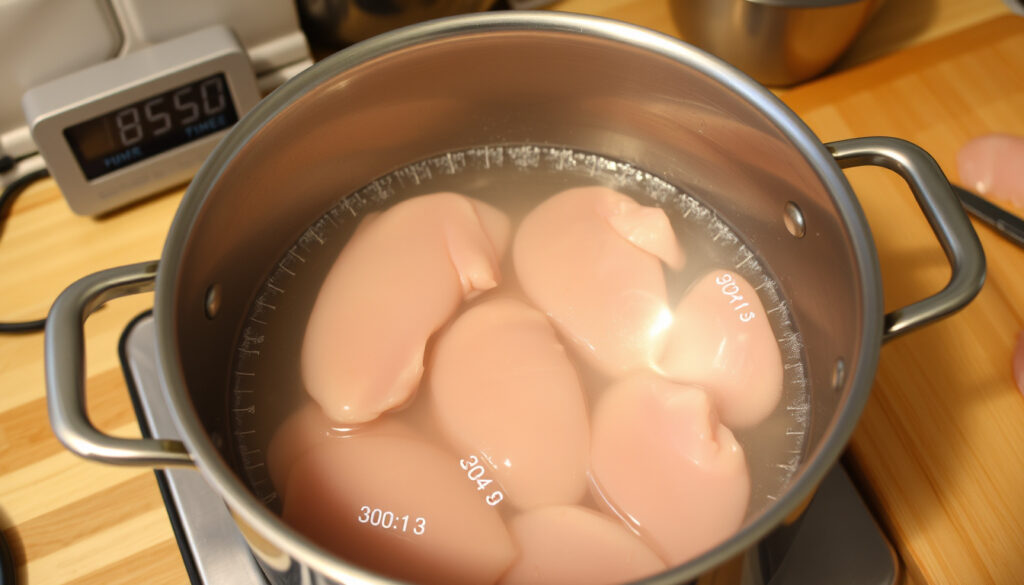
How Long to Boil Chicken Breast – Times for Every Cut
Few kitchen tasks seem simpler than dropping a chicken breast into boiling water. But anyone who has pulled out a dry, rubbery piece of meat knows the trick isn’t in the boil — it’s in the simmer.
Average time for boneless skinless breast (thin): 8 minutes · Average time for boneless skinless breast (thick): 15 minutes · Safe internal temperature: 165°F (74°C) · Simmering liquid temperature range: 185-200°F (85-93°C)
| Fact | Value |
|---|---|
| Safe minimum internal temperature | 165°F (74°C) |
| Ideal simmer temperature | 185-200°F (85-93°C) |
| Average time for boneless breast | 10-15 minutes |
| Average time for bone-in breast | 20 minutes |
| Resting time after cooking | 5 minutes |
| Ratio of water to chicken | Enough to cover by 1 inch |
Quick snapshot
- 8-10 minutes (Food Network cooking guide)
- Cutlet thickness under 1/2 inch (Food Network cooking guide)
- Check with thermometer at 165°F (Food Network cooking guide)
- 12-15 minutes (Delish recipe guide)
- Thickness 1 inch or more (Delish recipe guide)
- Let rest 5 minutes (Delish recipe guide)
- 18-22 minutes (Sanderson Farms cooking chart)
- Larger mass, bone conducts heat (Sanderson Farms cooking chart)
- Internal temp 165°F near bone (Sanderson Farms cooking chart)
- 6-8 minutes (Delish cooking advice)
- Small pieces cook fast
- Do not overcrowd pot
How long should I boil chicken breast?
Boneless skinless breast thickness and time
For boneless, skinless chicken breast, thickness is the variable that matters most. Thin cutlets — those under half an inch — typically need about 8 minutes in simmering water. Larger breasts around one inch thick take 12 to 15 minutes. The Food Network cooking guide emphasizes checking the thickest part with a probe thermometer rather than relying solely on the clock.
The difference between 8 and 15 minutes doesn’t come from a recipe preference — it comes from physics. A breast that’s twice as thick needs roughly double the time for heat to reach the center.
Bone-in breast time variation
Bone-in chicken breast requires more time because the bone acts as a heat sink. According to the Sanderson Farms cooking times chart (a major US poultry producer), bone-in breasts generally need 18 to 22 minutes in simmering liquid. The internal temperature must reach 165°F (74°C) when checked near the bone, where heat penetration is slowest.
The implication: thickness drives time, and a thermometer is non-negotiable.
Can you overcook chicken by boiling it?
Signs of overcooked chicken
- Dry, stringy texture that falls apart unevenly.
- Tough, rubbery bite — the meat resists rather than separates.
- Loss of juices; the breast appears shriveled or shrunken.
The Delish guide to boiling chicken warns that keeping the pot at a rolling boil — rather than reducing to a simmer — is the fastest route to tough meat. High heat forces moisture out of the protein fibers, leaving them dry and chewy.
Why simmering prevents toughness
The ideal cooking temperature for chicken breast in liquid is 185-200°F (85-93°C), well below the 212°F of a full boil. This gentle heat lets the meat cook evenly without shocking the proteins. The USA Today guide on boiling chicken stresses that simmering, not boiling, is the correct technique for tender results.
Temperature control during cooking
To maintain the right temperature, bring the water to a boil first, then immediately reduce the heat until only small bubbles rise to the surface. A kitchen thermometer clipped to the pot helps keep the liquid between 185°F and 200°F. The Hawaii Department of Health food safety guidelines align with this method as part of safe poultry handling.
A rolling boil cooks the outside faster than the inside. By the time the center reaches 165°F, the outer layers have already lost their moisture. Simmering keeps the entire breast at the same pace.
The pattern: heat control is the single variable that separates tender from tough.
Should you boil chicken breast covered or uncovered?
When to cover the pot
Covering the pot traps steam and heat, which shortens cooking time by roughly 10 to 20 percent. This is useful when you want to reduce energy use or speed up meal prep. The Delish guide recommends covering the pot while bringing the water to a boil, then removing the lid slightly or leaving it partially ajar once you reduce to a simmer.
When to leave uncovered
Cooking uncovered allows steam to escape, which concentrates the cooking liquid into a richer broth. If you plan to use the poaching liquid for soup or sauce, keeping the pot uncovered for part of the cooking time helps reduce and intensify flavor.
Effect on cooking time and moisture
Most recipe specialists — including Food Network’s cooking experts — suggest leaving the pot partially covered. A tight lid can cause the liquid to climb back to a boil, while no lid at all may extend cooking time. The compromise: cover loosely, so steam can escape but heat stays consistent.
What this means: the lid position is a trade-off between speed and flavor concentration.
What are common mistakes when boiling chicken?
Starting with cold water
Dropping chicken into cold water and then bringing it to a boil leads to uneven cooking. The outer layers cook before the center has even warmed up, increasing the risk of overcooking the outside. Instead, bring the seasoned water to a simmer first, then add the chicken.
Boiling at a rolling boil
As the Delish cooking team notes, a rolling boil is the enemy of tender chicken. High heat forces moisture out of the meat and makes the proteins tough. The correct method: bring water to a boil, then immediately reduce to a gentle simmer.
Not resting after cooking
Once the internal temperature hits 165°F, remove the chicken from the liquid and let it rest for 5 minutes. Resting allows the juices to redistribute throughout the meat rather than spilling out onto the cutting board. The USDA FSIS safe temperature chart confirms 165°F as the safety threshold, but resting is a quality step beyond safety.
Skipping the thermometer
Time estimates are helpful, but only a probe thermometer confirms doneness. The Health Canada safe internal cooking temperatures guide lists 165°F (74°C) for all poultry cuts. Insert the thermometer into the thickest part of the breast, away from bone, and wait 10 seconds for a stable reading.
The most common error isn’t timing — it’s skipping the thermometer entirely. A 15-minute timer is meaningless if your stove runs hot or your breast is thicker than average. The thermometer is the only reliable judge.
The catch: each mistake independently undermines the goal of juicy, tender meat.
How long to boil chicken breast to shred?
Ideal time for shredding texture
For shreddable chicken, aim for a slightly longer simmer — 15 to 18 minutes for a standard boneless, skinless breast. The extra time allows the connective tissue to break down further, making the meat pull apart with minimal effort. The YouTube how-to by the Delish team demonstrates this technique.
Shredding techniques
Two forks remain the classic tool: hold the breast steady with one fork and pull with the other. For larger batches, some home cooks use a stand mixer with the paddle attachment on low speed for about 30 seconds. Both methods work best when the chicken is still warm — cold chicken clumps rather than separates.
Using a stand mixer or forks
Warm chicken shreds cleanly. Cold chicken fights back. If you’re meal-prepping for the week, shred immediately after resting, then portion into containers. A stand mixer saves time on bulk batches but won’t fix chicken that was undercooked or boiled at too high a heat.
The implication: timing and temperature are the foundation for perfect shredding.
Step-by-step method
- Season the water with salt and aromatics, then bring to a boil.
- Reduce heat to a gentle simmer (185-200°F).
- Add chicken breast and cook according to thickness: 8 min for thin cutlets, 12-15 min for thick, 18-22 min for bone-in.
- Check internal temperature at the thickest part; must reach 165°F (74°C).
- Remove from liquid and let rest for 5 minutes before slicing or shredding.
wisconsinrivermeats.com, reddit.com, uscontext.org, spice.alibaba.com
If you’re unsure about the exact timing, our detailed guide on boiling chicken breast times provides precise times for every cut.
Frequently asked questions
Is it better to boil or simmer chicken breast?
Simmering is better. Boiling at 212°F toughens the meat, while simmering at 185-200°F keeps the breast tender and evenly cooked. The USA Today guide explicitly advises against a rolling boil for this reason.
Can I boil frozen chicken breast?
Yes, but it will take about 50 percent longer — roughly 20 to 25 minutes for a standard frozen boneless breast. The USDA FSIS recommends checking the internal temperature at the thickest part to confirm 165°F, as frozen meat can cook unevenly.
How do I know when boiled chicken is done?
Use an instant-read thermometer. Insert it into the thickest part of the breast. The Minnesota Department of Health cooking temperatures confirm 165°F (74°C) as the safe minimum. The meat should also be opaque throughout and the juices should run clear.
Should I salt the water when boiling chicken?
Yes. Salting the water — about 1 teaspoon per quart — seasons the meat from the inside out. Unlike dry brining, this method doesn’t require advance preparation. Some cooks also add aromatics like garlic, bay leaves, or peppercorns to the poaching liquid for extra flavor.
Can I reuse the water from boiling chicken?
Yes, the leftover liquid makes an excellent base for soup, rice, or sauces. Strain it to remove any solids and refrigerate for up to 3 days or freeze for up to 3 months. The natural gelatin from the chicken adds body and flavor to soups and stews.
How long does boiled chicken last in the fridge?
Cooked chicken breast stays safe in the refrigerator for 3 to 4 days when stored in an airtight container. The USDA FSIS recommends keeping it at 40°F or below. For longer storage, freeze boiled chicken for up to 4 months.
Can I boil chicken breast in milk or broth?
Yes. Poaching chicken breast in broth adds flavor, while milk can create a richer, creamier result — common in recipes for poached chicken or chicken pot pie. The cooking time remains the same as water poaching, and you still need to reach 165°F internally. The Food Network cooking guide suggests broth as a natural flavor booster.
For anyone cooking chicken breast on the stove, the choice between boiling and simmering isn’t a matter of preference — it’s a matter of texture. Simmer gently, check with a thermometer, and rest the meat before cutting. For home cooks in the US, that five-minute rest and a quick thermometer reading make the difference between dry leftovers and tender, versatile chicken you’ll actually want to eat.
More related posts
 2024 Calendar with Holidays: US, Ireland, Germany Guide
 Things to Do in Washington DC: Top Attractions & Itinerary
 Neil Patrick Harris Amy Winehouse Controversy Explained
 Cast of Dune: The Sisterhood – Dune Prophecy Actors Guide
 Anna’s Wild Yam Cream: Does It Work? Benefits & Usage Guide
 When I Flu Sea on? Timing, Peak Month , and What to Know
 Shop Laptop Case Nearby: Best Dublin Stores
 Resident Evil Movies in Order: Complete Watch Guide